Day 5 – Section 7 – Continue The Rudder
- Fred
- 0
- on Aug 09, 2022
Today I picked up with the task of match drilling the skins and ribs of the rudder. I kinda score in that I discovered MOST of the holes were already punched to “final size” at the factory. Some recently developed kits came like this, and I guess I lucked out! I felt like the trailing edge was a bit tight though, so I decided to give the edge and two mated skins a once over. Since the holes were already close to the right size, I was able to use my strait-flute reamer instead of the drill bit. This saves work when it comes time to deburr the whole lot. This also ended with the anti-climactic task of taking all the clecos out and seeing everything in pieces again.


The next task was a pretty strait forward, but needs some pictured to clarify. The idea was to put a slight bend in the trailing edge of the skins to help make sure they lay flat together. To accomplish this, I used a specialty tool from Cleveland Tools called an Edge Forming Tool. It looks like a pair of vice grips with some rollers welded on the tips. They did a slick job. In the photos below I show them in action on a piece of scrap that I tested on before touching the rudder.


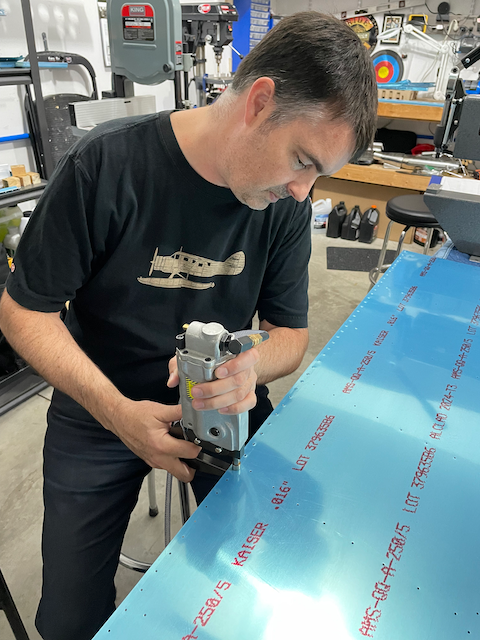
The final task of the night was dimpling the skins, ribs, and stiffeners. This was a lot of work. There were two tools used that are both amazing, depending on what part you are working on. The larger tool, is a bench-top compression type dimpling tool called a DRDT-2, and the handheld one is a super cool pneumatic squeezer that is also used for riveting. The only problem with the handheld squeezer is that the yoke on it is only a few inches deep, so it is only used along edges.
More important than the tool selection was the pre-planning to make sure I dimpled the CORRECT holes. It is very easy to mess this up (ask me how I know). I marked each hole before starting, and it turned out great!


Next time, I will be working on machine countersinking the trailing edge and getting ready to rivet.